LA TOWING & RECOVERY, LLC (920) 833-1661
How to Safely Jump-Start a Dead Battery Without Damaging Your Engine
Protect Your Engine and Your Wallet
Step One: Preparation and Inspection
Before attempting to jump-start a vehicle, ensure you have quality jumper cables, typically 10 to 12 feet in length with thick-gauge wiring. The cables should feature clearly marked red (positive) and black (negative) clamps with sturdy copper conductors. Additionally, verify that the donor vehicle has a battery with matching or higher voltage than the dead battery.
Inspect both batteries for visible damage, including cracks, leaks, or excessive corrosion around the terminals. If either battery appears compromised, do not proceed with the jump-start. Instead, contact roadside assistance to prevent potential hazards. In Little Chute, WI, where freezing temperatures during winter months can accelerate battery degradation, this preliminary inspection becomes particularly important for safe operation.
Safety equipment such as gloves and eye protection should also be readily available. Battery acid is corrosive, and sparks during the connection process can cause injury. Taking these precautionary measures before beginning the jump-start procedure significantly reduces the risk of personal harm or vehicle damage.
Step Two: Proper Vehicle Positioning
Park the donor vehicle close enough to the disabled vehicle so that the jumper cables can reach both batteries comfortably, but ensure the vehicles do not touch. Position the cars either nose-to-nose or side-by-side, depending on where the batteries are located under the hood. Both vehicles must be in park (or neutral for manual transmissions) with parking brakes engaged.
Turn off all electrical accessories in both vehicles, including headlights, radios, climate control systems, and phone chargers. These devices draw current that can interfere with the jump-start process and potentially damage sensitive electronic components. Modern vehicles in particular contain sophisticated computer systems that can be vulnerable to voltage spikes during improper jump-starting procedures.
Ensure both ignitions are turned completely off before proceeding to connect the cables. This step prevents electrical surges that could harm the vehicle’s electrical system. Wisconsin drivers often encounter dead batteries after extended periods of cold weather inactivity, making proper vehicle positioning and shutdown protocols essential for preventing additional complications during the recovery process.
Step Three: Cable Connection Protocol
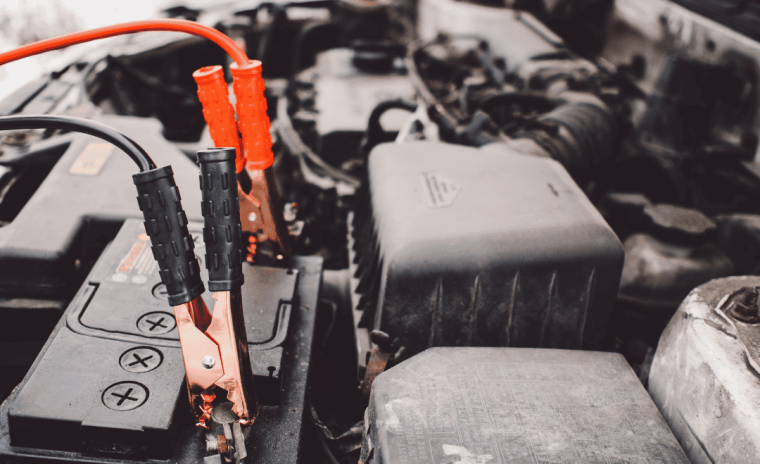
The order in which you connect jumper cables is critical to preventing sparks near the battery and avoiding damage to the vehicle’s electrical system. Begin by attaching the red (positive) clamp to the positive terminal of the dead battery. The positive terminal is typically marked with a plus sign and may have a red protective cover. Ensure the clamp has a secure, metal-to-metal connection with the terminal post.
Next, attach the other red (positive) clamp to the positive terminal of the donor battery. Follow this by connecting the black (negative) clamp to the negative terminal of the donor battery. The final connection requires special attention: attach the remaining black (negative) clamp to an unpainted metal surface on the engine block or frame of the disabled vehicle, away from the battery itself. This grounding point minimizes the risk of sparks igniting hydrogen gas that may be present near the battery.
Never connect the final negative clamp directly to the negative terminal of the dead battery. This common mistake creates a spark risk in close proximity to the battery, where flammable gases can accumulate. For vehicles that have experienced battery failure during Wisconsin’s harsh winter conditions, this precaution becomes even more important as cold batteries are more prone to off-gassing.
Step Four: Post-Start Protocol and Testing
Once all connections are secure, start the donor vehicle and allow it to run at idle for two to three minutes. This charging period allows the functional battery to transfer some charge to the depleted battery, increasing the likelihood of a successful start. After this brief waiting period, attempt to start the disabled vehicle. If it does not start immediately, wait a few more minutes and try again rather than continuously cranking the starter motor, which can cause overheating.
If the vehicle starts successfully, allow both vehicles to run for several minutes before disconnecting the cables. This stabilization period helps ensure the revived battery begins accepting a charge from its own alternator. When ready to disconnect, reverse the connection sequence exactly: remove the black clamp from the engine ground on the previously dead vehicle first, then the black clamp from the donor battery, followed by the red clamp from the donor battery, and finally the red clamp from the revived battery.
After disconnecting, keep the revived vehicle running for at least 20 to 30 minutes to allow the alternator to recharge the battery adequately. Avoid turning off the engine immediately, as the battery may not have sufficient charge to restart. Drive the vehicle rather than letting it idle, as driving generates more charging current. If you experience repeated battery failures or the vehicle will not hold a charge, the issue may extend beyond a simple dead battery and require assessment from a qualified technician.
In situations where a jump-start is unsuccessful or you lack the proper equipment, towing and recovery services provide a safe alternative. Available throughout the Little Chute, Appleton, Neenah, and Kaukauna areas, roadside assistance can deliver the support you need when battery issues arise unexpectedly. Contact our team at 9208331661 for immediate help with battery service and vehicle recovery whenever you find yourself stranded.
Step Five: Recognizing When Professional Help Is Needed
After the disabled vehicle starts successfully, do not immediately disconnect the jumper cables or shut off either engine. Allow both vehicles to run simultaneously for at least two to three minutes. This stabilization period ensures that the previously dead battery begins accepting a charge and that the vehicle’s alternator engages properly to sustain electrical system function. During this time, avoid turning on high-demand electrical accessories such as headlights, air conditioning, or the radio in the jump-started vehicle, as these can place excessive strain on a weakened battery and alternator.
When disconnecting the cables, reverse the connection sequence precisely. Start by removing the black (negative) clamp from the unpainted metal ground on the previously disabled vehicle. Next, remove the black clamp from the negative terminal of the donor vehicle’s battery. Then disconnect the red (positive) clamp from the donor battery, and finally remove the red clamp from the positive terminal of the jump-started vehicle. Following this exact order minimizes the risk of electrical shorts or sparks that could damage sensitive electronic components in modern vehicles.
Once the cables are safely stowed, keep the jump-started vehicle running for at least 20 to 30 minutes to allow the alternator to recharge the battery. If possible, drive the vehicle rather than letting it idle, as driving generates more charging power. Monitor the dashboard for warning lights, particularly the battery or charging system indicator. If warning lights remain illuminated or the engine runs roughly, the issue may extend beyond a simple dead battery and could indicate alternator failure, a parasitic electrical drain, or internal battery damage.
Before relying on the vehicle for extended trips, consider having the battery and charging system tested at a service facility. Many auto parts retailers offer free battery testing, and professional roadside assistance providers can perform on-site diagnostics. If the battery fails to hold a charge or the vehicle will not restart after being turned off, it is safer to arrange for towing services than to risk becoming stranded in an inconvenient or unsafe location.